Friday, 13 June 2014

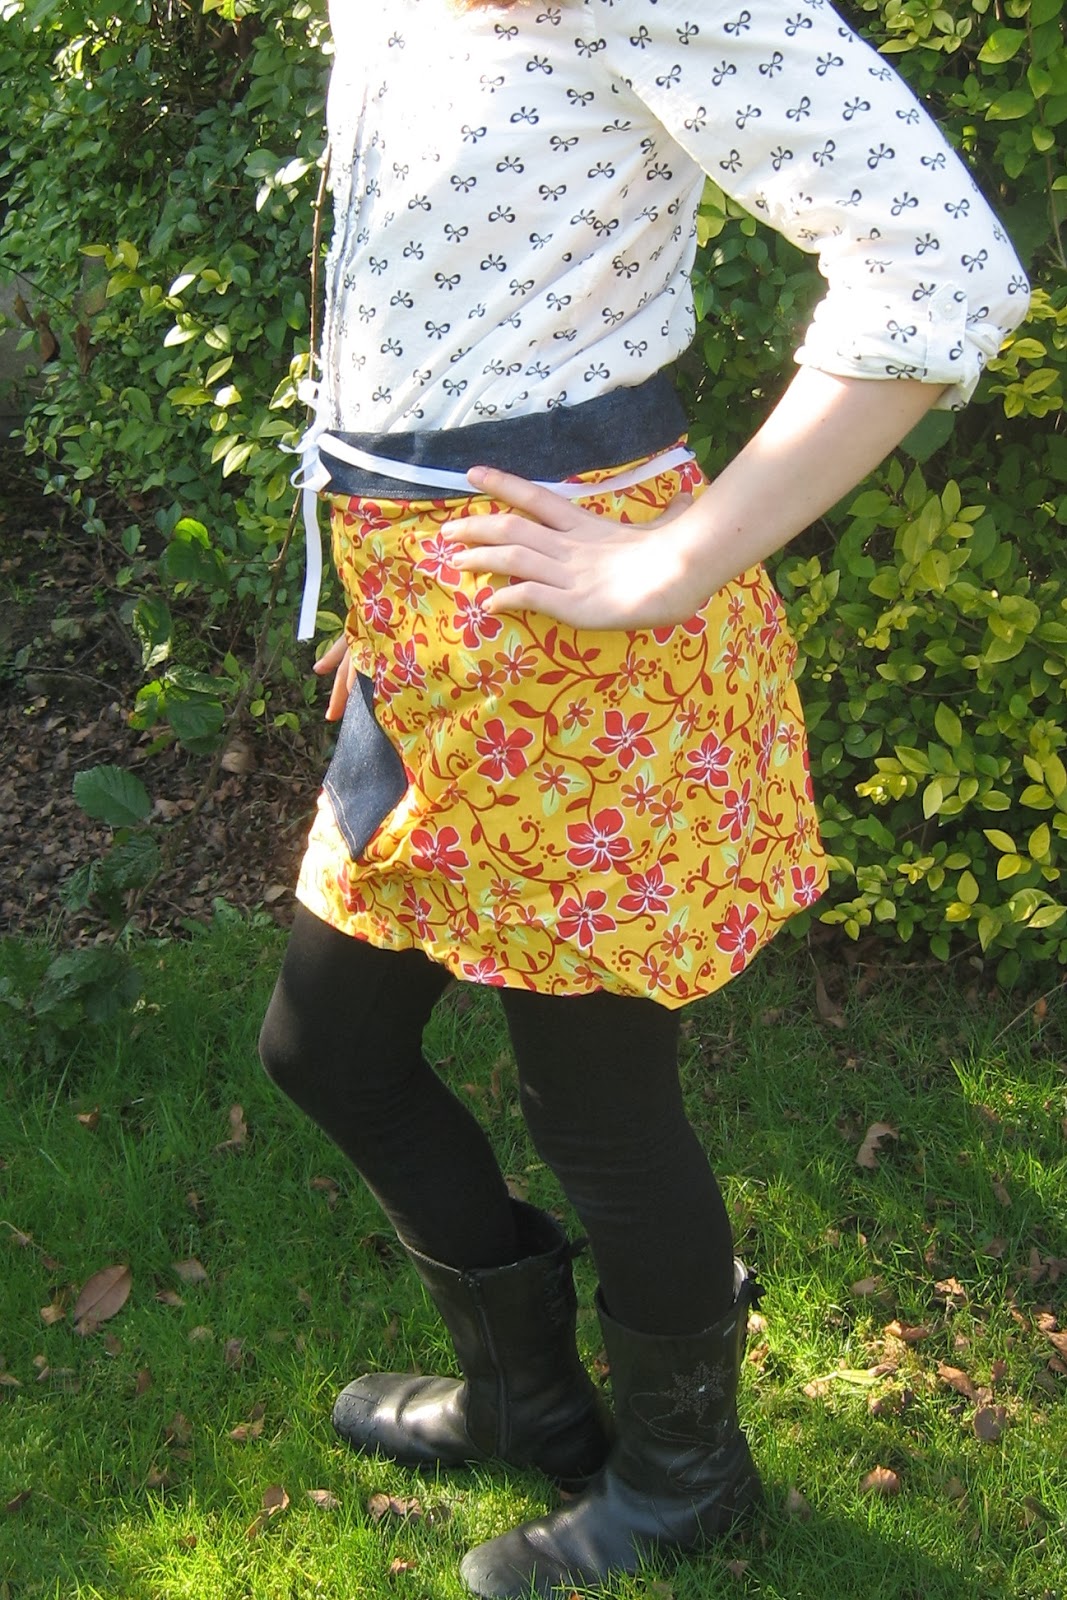
My sisters swim dress for summer 2014

Some of you may know that for summer last year I made a swimming dress for me and my sister but my sister has now out grown her old one so today I spent the morning making her a new one. I found the material yesterday for £2.50 and I absolutely love the way the dress has turned out, it's funky and cute but not too childish (as my sisters getting to the stage where she wants to look a bit more grown up).
I made this by tracing round tops, skirts and dressed from her wardrobe to find the best fit. However I now have a free pattern that shows you exactly how you too can make a dress like this, which you can find here.
I also made a bikini bottom in the same fabric so that if the dress does ride up by accident it won't be as obvious what they are but for obvious reasons I won't display them on the internet.
I also had to show you the hairstyle my sister was wearing today. You can find a video on how to do this hairstyle here.
Those of you who have been following my blog for a while may realise that recently I have been distracted by my exams but I'm soooooo pleased to tell you that I have finally finished and I'm really excited to get back into sewing.
I hope this has inspired you!

Sunday, 8 June 2014

My super cute lace top

I know that I've not been very frequent in posting my projects recently but I do have an excuse, it's currently the exam season where I live and I've been quiet busy revising since February (I know that February seems like a distant memory but the exams are important to me).
Still I managed to fit in a bit of sewing time recently, as I've almost finished my exams, and made this lovely crop pull over lace top.

This fabric came from a 60p and as I have used the other 2 pieces of material the grand total cost of this top is 20p. I improvised the pattern but if you would like a post about how I made this top feel free to leave a comment.
I hope this has inspired you!

Wednesday, 12 March 2014

Hawaiian apron

It's always nice to make something for someone else especially when it gets a surprising amount of use.  I made this apron for no one in-particular but when my sister said she needed an apron to take with her to guides (and there was no way she was taking any of my mums, for fear of it getting lost). I gave her the apron as a surprise gift and boy has it served her well.

  I got the pattern from an apron book which I got a while back and so can't remember where I got if from.

 The material came from my mum's stash; she got it a while ago and said that she wouldn't mind me using it, as she had never found a use for it. I love it's tropical feel, especially when the weather is starting to get sunny again outside.
Have you ever made an apron?

I hope this has inspired you!

Sunday, 2 March 2014

Fashion scrapbook

A couple of weeks ago my friend commented on my outfit and asked me how I chose what I wear in the morning. My answer is quite simply, I use a scrapbook with cut outs from magazines and catalogues. Then I look in my wardrobe and see if I have pieces of clothing that look like what's in the outfit and usually end up with  something a bit like the original outfit. When I told my friend she asked me if I could make one for her, so I did, for her 16th birthday. Here's what the pages look like:


I hope this has inspired you!

Tuesday, 18 February 2014

My valentines gift

I've been meaning to write this post ever since Friday when my boyfriend gave me my wonderful valentines gift. I'm writing this post in case you get any inspiration from what he gave me (because I know I would never have come up with this idea myself). On Friday afternoon he presented me with this beautiful hand made rose. Yes I do mean to say handmade, the rose was an origami paper rose.

 I am definitely appreciating the fact that it's handmade because I know he's taken the time to not only think about me but to make something for me. This feeling has definitely inspiring me to make handmade gifts for those I hold dear more often.
 I hope this has inspired you!

Wednesday, 12 February 2014

Valentines day

With valentines day coming up I thought I'd share my ideas for what I'm giving to my valentines this year. The first thing you definitely need is a card. I was looking for a card that wasn't completely cheesy. When looking on Pintrest for craft ideas I found these perfect FREE printables. Here are a couple are printables I absolutely love. The first is from Artsy-fartsy mama with you're a hoot, for any star wars lovers, harry potter lovers and many more themed sets look here and finally for that extra touch on the envelop why not use these amazing monogram stickers.
My next item on my valentines list is a home-made one. I really struggled to come up with something to make that wouldn't be too girly and I finally decided to make a cake. Who doesn't like food? and more importantly, who doesn't like sharing cake?!

My cake was an almond one smothered in chocolate with a hidden heart centre (come on it is valentines day).
Finally I got him a super cool valentines day themed coaster from the here. This company make amazing slate/ house hold items. They do all kinds of themes, at Christmas they had wonderful table mats that had little reindeer's on them and they also currently have a great range of valentines gifts. It's well worth a look :) The item I bought can be seen bellow.
 
I hope this has inspired you!

Friday, 7 February 2014

Quick beaded friendship bracelet

I know this new year post is well over due but 2014 has so far been unbelievably busy, meaning that until now I've not been able to do anything crafty. But last weekend I made  a super cute blue friendship bracelet. If you want to make one yourself the instructions are further on in this post.

You will need:

  • 3x 160cm embroidery strands
  • 3 to 5 large beads
  • scissors

Instructions

  1. Fold the 3 strands in half and knot leaving a loop at the above the knot as seen bellow. You should now have 6 strands.
  2. Next groups the strands into twos, making 3 strands. Now start platting.
  3. Platt for 1.5cms then thread the middle strand through your first bead. Cross the two remaining threats bellow the bead and carry on platting.
  4. Repeat step three until your bracelet is the required length.
  5. Platt for a bit longer, to make a the clasp, and knot off.
  6. Finally cut the strands place round your wrist and use the extra length to knot to tie round the loop.

I hope this has inspired you!